By: Alex Martinez
Introduction
This physical education unit introduces the sport of sitting volleyball to students of all abilities and skills. The unit includes drills and activities for teaching proper execution of sitting volleyball basic fundamentals. The unit also features general adaptations to ensure the inclusion of students with disabilities, tips to modify equipment and class and student assessment.
Sitting volleyball originated in the Netherlands in 1956. After entering as a “demonstration” sport during the 1976 Paralympic Games in Toronto, Canada, Sitting volleyball was first included in competition at the 1980 Paralympic Games in Arnhem, Netherlands. It has been in every Paralympic Games since. In 1984, the United States participated in its first Paralympic Games in New York City. In the 2004 Paralympics, held in Athens, Greece, the United States Men’s Team finished 6th, and the United States Women’s Team finished 3rd, taking home a bronze medal. Both finishes were the best ever for United States.
Description & Objective
Description
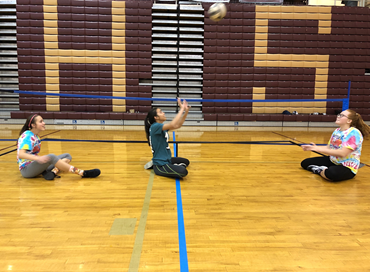
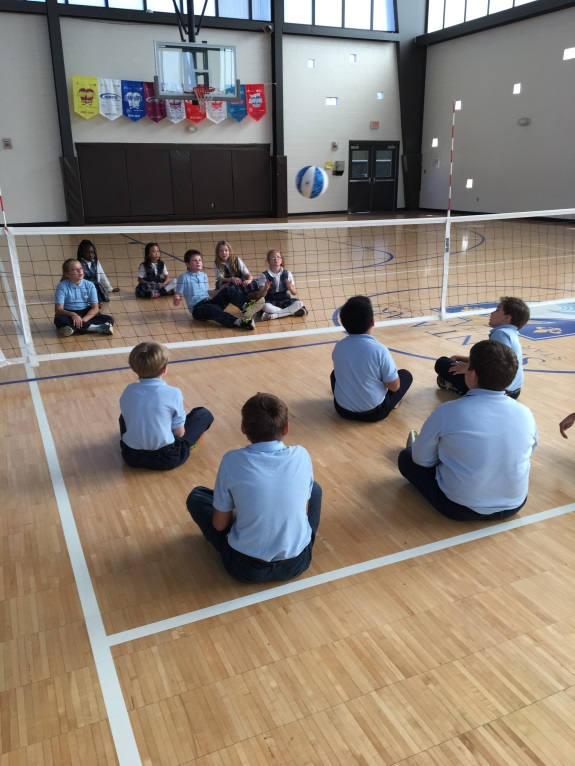
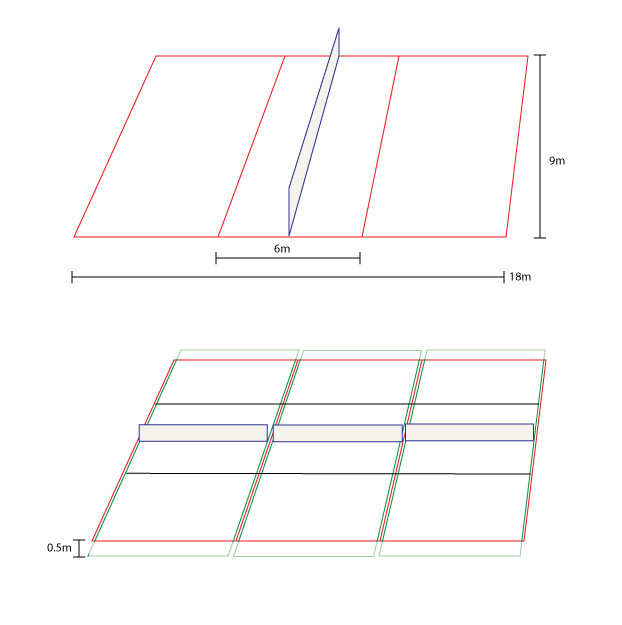
Sitting volleyball is a modified discipline of volleyball that can be played by students with or without disabilities. Sitting volleyball is very similar to traditional volleyball. But there is one main difference: in sitting volleyball, a part of the student’s body between the bottom and the shoulder must be touching the court when making or attempting ball contact. Students use their hands to play the ball and to move on the floor as well. Teams are allowed three touches of the ball before it must cross over the net into the opposing team’s half of the court. Each match is made up of five sets. The first four sets are played to 25 points. The fifth set is played to 15 points. All sets must be won with at least a two-point advantage. The size of the court is reduced from 18 m x 9 m to 10 m x 6 m. The height of the net is lowered to 1.15 m for men and 1.05 m for women As a result, the game is much faster than traditional volleyball. If you have a regular court in the gym, by stringing a net or rope down the middle of the court in a perpendicular fashion, you could have 3 sitting volleyball courts using the same lines (figure 1).
Objective
To “volley” the ball over the net to cause the opposing team to mishit or miss contact with the ball, all while keeping the ball inbounds.
Equipment & General Adaptations
Equipment
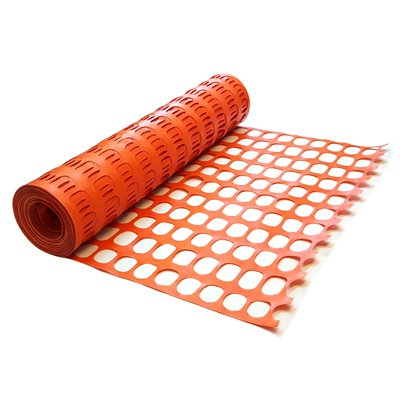
Beach ball, balloons, volleyball net or boundary, knee scooters, hula hoops, timer, music player, scoring board, whistle, tape, cones, ball carts, and bean bags. An alternative net could be made out of ropes, badminton net, tennis net, or construction netting (picture #2).
General Adaptations
- Allow for multiple hits beyond three for each side.
- Allow the ball to bounce (like in the game of Newcomb).
- Allow the server to serve closer to the net.
- Allow for underhand passing (do not call for lifting the ball).
- Allow the student to catch the ball first and then put it back up for play.
- Use larger, softer, brightly colored balls for motivation and fun.
- Minimize unnecessary background noises.
- Use a beeping volleyball, or alternative ball, with a noise-making device for students with vision loss.
- Maintain bright lighting and a good contrast with background colors (brighter balls for easier tracking).
- If a wheelchair is obstructing underhand motions, work on overhand versus underhand serve skills.
- Have students throw the ball in for serves, underhand pass, overhand pass, and sets.
- If the ball lands near a student who uses a wheelchair, instruct a teammate to set the ball on the lap tray of the student using the chair. Instruct the student who uses the wheelchair to put the ball back into play by knocking the ball off the lap tray (with head or arm) or rolling it down a ramp. Ending one foot from ground, have peer dig for the ball before it lands and put it back into play.
PE Standards & Skills
Sitting Volleyball Unit
Unit Outcomes: Upon completion of the unit, students will demonstrate basic skills needed to participate in a modified volleyball game.
Grade Level
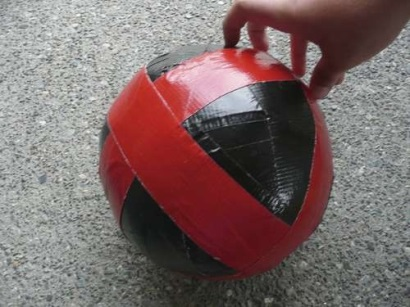
This unit is designed for 4th grade and up. For the lower elementary levels used lightweight balls or a balloon with duct tape around it to increase the speed of the flight. Do not use balloons if any of the students suffer from latex allergies (picture #3).
National Physical Education Standards
SHAPE America’s National Standards define what a student should know and be able to do as result of a quality physical education program. States and local school districts across the country use the National Standards to develop or revise existing standards, frameworks and curricula.
- Standard 1 – The physically literate individual demonstrates competency in a variety of motor skills and movement patterns.
- Standard 2 – The physically literate individual applies knowledge of concepts, principles, strategies and tactics related to movement and performance.
- Standard 3 – The physically literate individual demonstrates the knowledge and skills to achieve and maintain a health-enhancing level of physical activity and fitness.
- Standard 4 – The physically literate individual exhibits responsible personal and social behavior that respects self and others.
- Standard 5 – The physically literate individual recognizes the value of physical activity for health, enjoyment, challenge, self-expression and/or social interaction.
Activity/Skills Cues
Note: There are no activity cues for the skill of blocking to allow for more rallies. As the students progresses introduce blocking drills/activities.
Movement
- Legs in front of you and slightly bent.
- Arms down with hands on the floor ready to push in all directions.
- Stay alert and ready to move
Overhead Passing / Setting
- Open hands and spread fingers into a ball-shaped “cup” above the forehead.
- Make a triangle with the thumbs and pointer fingers.
Forearm Passing / Dig
- Thumbs together and even in height.
- Point thumbs downwards.
- Keep arms fully extended to create a platform with your forearms.
- Direct the platform angle to rebound the ball towards your target.
Serving
- Pull back on your hitting arm as if you were going to shoot a bow and arrow.
- In your non-hitting hand, raise the ball to shoulder height with your arm in front of you.
- Toss the ball gently 1-2 feet out of your hand.
- Swing through the ball to your target.
Sitting Volleyball Example Activity
Adapted physical education prepares students with disabilities to participate in games and sports that their typically developed peers participate in as well. The goal of this unit is to teach students with disabilities the rules of the sport of sitting volleyball, as well as teaching the students how to perform the various motor skills required to play the sport. To achieve this overall goal the students will participate in various modified games and drills.
| Time: 5 min | Warm Up: These activities are not only design to prepare the body for the physiological demands of physical activity but also to introduce or practice individual skills (i.e. movement, overhand passing, underhand passing, setting, serving, hitting, blocking, etc). |
| Movement, boundaries | Tag Object: To not become ‘IT!’ Equipment: Gym floor Description: Participants move around the floor while sliding on their buttocks, all the while trying to avoid becoming ‘IT’. Variations: • More than one person ‘IT’ at a time • Start with one person ‘IT’, and each participant whom he/she touches becomes ‘IT’ as well until everyone is caught. • Use a ball to tag. • Use pool noodles to tag. |
Catching, ball control, overhand set, forearm pass, movement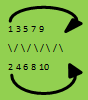 | Ball Slither (Centipede) Object: To send the volleyball to the end of the line and back as many times as possible without dropping Equipment: Gym floor, volleyballs Description: • Participants sit on the floor and form two lines facing one another. • The ball starts at one end, is thrown in a controlled way to the first person across, who catches it and then then throws it back across to the next person, etc., all the way down the line and back. • After throwing the ball the students move to the end of the line to keep the game continuous. Variations: • Use different types of balls (lighter, bigger) for different age groups. • Progress from catching to overhand setting to forearm pass. • Establish a distance for teams to cover and promote competition. |
| Catching, ball control, overhand set, forearm pass, movement | The HarvestObject: To collect all the items on the court and place them in the basket Equipment: • A lot of anything that can easily be picked up and carried – be creative! • Gym floor, hula hoops, balls and baskets or bins Description: • Items are scattered throughout each side of the court – make sure there is the same number per side. Place a hula hoop in the middle of each side. • Two even teams are seated on either side of the net. • On a signal, each team begins moving around the court on their buttocks and collecting the items one at a time – do not allow carrying more than one item at a time. • Once an item is collected, it must be placed in the ‘basket’ (hula hoop). • Once all items have been collected by one team, that team’s players must hold onto the hula hoop and yell their team name. Variations: • Place the hula hoop elsewhere on the court or even off the court to make movement more challenging. • Used a large basket or bin to make student’s throw the object into the basket. • Collect only balls and instruct the students to self-pass (forearm) or self-set (overhead) to the basket. |
| Catching, ball control, overhand set, forearm pass, movement | Odd Ball Object: To have as few balls as possible in your team’s possession when the whistle is blown. Equipment: • A good number of volleyballs (or other types of balls) per game, volleyball court with a net. Description: • One team is seated on each side of the net, with an even number of balls per side. • On a signal, each team begins throwing the balls to the other team. Balls are caught and thrown back over the net. • You want as few balls as possible on your side of the net when the whistle is blown. • One point is given for each ball in the team’s possession at the end of the game, and the team with the lowest score is the winner. Notes: • Players must move while sitting on the floor. • Assistants (or other players) can help to prevent balls from going too far outside the court. Variations: • Use an underhand serve, overhand serve, and forearm or overhead pass rather than throwing the ball over the net. |
| Time: 5 min (demo) Time: 25 min Catching, ball control, overhand set, forearm pass, movement, serving, throwing, spiking, rotation order, boundaries | Learning Experiences/Activity(ies)Introduce the game of constant rotation. Divide the class in two teams. Explain and demo counter clockwise rotations.Set up: • 4 vs. 4 (small size court) • 5 vs. 5 (regular court) • 6 vs. 6 (regular court) Constant Rotation Object: To “volley” the ball over the net. The game could be cooperative or competitive. During cooperative games, the objective is to keep the ball in play between teams as many times as possible using a designated amount of contacts per team side. For competitive games, the objective is to cause the opposing team to mishit or be unable to hit the ball, all while keeping the ball inbounds.Equipment: • Volleyballs, net, gym floor. Game procedures, variations, and progressions: • 6 on 6 (regular court), 5 on 5 (regular court), or 4 on 4 (smaller court): Any extra players form a line off the court. Players catch and throw the ball over the net and try to get their opponents to misplay the ball or ground the ball on their opponent’s side of the net. • To start and resume the game use the following progressions: o Toss initiated by a teacher or a student. o Serve (underhand, overhand) o Bounce ball o Attack from the sideline (for advance skill students). • When the ball is caught upon coming over the net, it is thrown to a teammate, who then also throws it to another teammate, who then throws it over the net (three contacts). No walking with the ball. Use the following progressions. o Send the ball over the net on two contacts instead of three. o Let the ball bounce before catching it. o Self-toss and pass or set after catching. o Set the ball or pass the ball instead of catching. o Throw the ball with one hand above the head (the basic movement for the spike). o Eliminate catching the ball for more advanced skills students. o Use unlimited time of contacts per team side. • When a teammate throws the ball over the net, the whole team rotates one position counter-clockwise – must remain in sitting position. This adds movement and excitement to the game. Eliminate constant rotations to simplify the game. • Play mini-games of 5 points using rally scoring or use time (i.e. 5 minutes of play). • Use “Queen “or “King” of the court format to add competition to the game. Ensure that the skill level of the teams is matched. For this forma, the team that wins the point stays in the court and the team that losses the point exits the court to allow for a new team to come in. *To increase physical activity instruct the team exiting the court to perform an exercise. *Use these various game formats/drills trough out your unit. Focus on one or two formats/drills per lesson. Incooproprate difficult formats/drills as the student progress (i.e. drill initiated from a down ball instead of a self-toss). |
| Time: 5 min | Cool downStretching Circuit Post a card at each court zone one with the name and picture of a muscle and a description of how to stretch it. Students perform the movement on the card. Rotate every 20 seconds.Copycat Circuit Position at least two students at each station. The imperative is to design an exercise or a stretch. When the circuit begins, partners perform their move while watching the station to their right. After 20–30 seconds, each pair moves one station to the right and performs the move the previous pair was doing.Muscle Mix Place students in pairs, in a scattered formation. Call out various directions: “Touch biceps to biceps, touch patella to patella,” etc. Each pair performs the movements. When you call out, “Muscle mix,” the partners split and form new pairs. You also find a partner, and the child without a partner is the new leader. (If there is an odd number of students, pair with the student who’s left and perform the moves as you call out directions; when partners change, choose another leader).Draw Two Create two piles of cards. One pile lists an exercise or a stretch on each card, and the second pile indicates repetition or time. A student draws a card from each pile. For example, the exercise card might say “sit-up,” and the number card might indicate “10.” Everyone performs 10 sit-ups. |
| Time: 5 minClosure | Class assessmentWrite questions on a beach ball and throw the ball to whoever wants it. The student who catches the ball answers whichever question is closest to him or her. Here are some questions to consider:• What did you learn today? • What did you like about the class? • What you dislike about the class? • What other rules would you like add to the games? • Can you rate the class from 1 to 10 (10 being the best)? • Will you give the class activities thumbs up or thumb down? • Would you use these activities during recess? • Did you consider the games easy or difficult? |
Assessment
Use the following rubric to assess the level of execuationf or each sitting volleyball skill. Chose one of the three assessment scales (level scale, four point scale, or three point scale).
- The rubric objectives are:
- To define what the target behavior or skill is and how to achieve it.
- To inform students and parents of the teacher’s expectations for the task.
- To help the teacher to be more accurate, objective, and unbiased when scoring.
- To help maintain instructional alignment with the learning objectives.
| Student’s Assessment | |||
| Date: | Class: | Student’s Name: | Rater’s Name: |
| Forearm passing/digThumbs together and even in height, point thumbs downwards, keep arms fully extended to create a platform, direct the platform angle to rebound the ball towards your target Rating: ___ | SettingOpen hands and spread fingers into a ball shaped “cup” above the forehead, makes a triangle with the thumbs and pointer fingers, uses finger pads to set the ball, shoulders face the target, ball goes to the hitter Rating:___ | HittingStarts away from the net, moves towards the ball by using the arms and pushing the lower body, pulls back the hitting arm, swings arm forward fast, reaches for high contact, and follows through the movement Rating:___ | ServingPulls back on the hitting arm, tosses the ball gently 1-2 feet out with the non-hitting arm, contacts the ball above the height of the head and slightly out in front of the body, hits with an open hand, follows through, hits the ball into the courtRating: ___ |
| Movement Legs in front of you and slightly bent, arms down with hands on the floor ready to push, stays alert and ready to move, anticipates where the ball is going and moves to the ball Rating:___ | TeamworkPlays own position, sets it up for others to hit, and encourages others Rating:___ | SportsmanshipPlays by all rules, acknowledges good plays by the opponent, and encourages teammates to do their best Rating:___ | Game Knowledge Knows the rules, knows how to keep score, knows the score, can tell a legal hit from an illegal hit, knows the boundaries, and knows when to use each skillRating: ___ |
Assessment/Rating Scales
Each skill is graded on a level scale described below:
(Level 1) Backyard Volleyball Player: cannot perform the skill correctly at all.
(Level 2) Physical Education Class Player: performs the skill inconsistently and awkwardly.
(Level 3) Recreational League Player: performs the skill correctly most of the time, but has trouble under pressure.
(Level 4) Tournament Player: performs the skill correctly all of the time.
Each skill is graded on a four point scale described below:
4 – Performs skill correctly just about every time (consistent).
3 – Performs the skill sometimes but is inconsistent.
2 – Performs the skill once in a while but more practice is needed.
1 – Cannot perform the skill
Each skill is graded on a three point scale described below:
3- Exceeds (competent)
2- Meets (emerging/recreational)
1- Developing (struggling)